 |
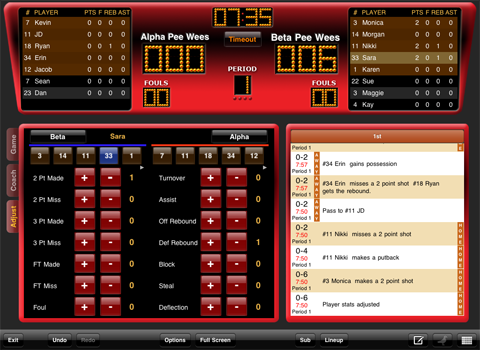
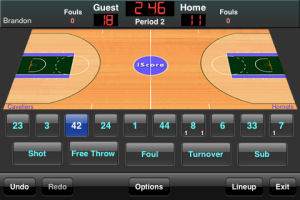
With iScore Basketball you can record as much or as little of the action as you want.
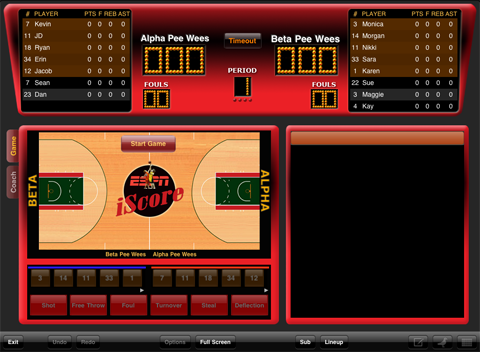
When you first start scoring you will see that each team has from one to five player
buttons depending on how many starters were set in the lineup. The numbers on the buttons
correspond to the jersey numbers of the players.
The key to performing any action in iScore Basketball is to select the player who currently has possession of
the ball from the available player list buttons.
|
 |
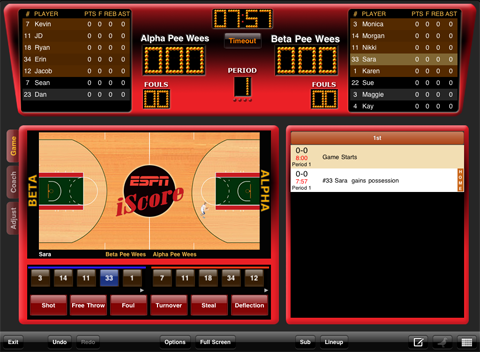
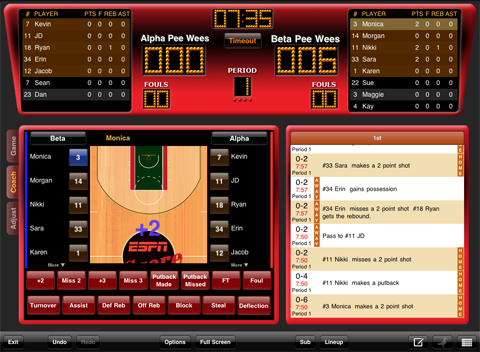
Once you have selected a player button you will notice that several things occur. First
you will see that the name of the selected player appears above the court, on the same side as the selected
player's team. This will help reinforce that you have selected the correct player.
Also, below the player buttons the action buttons now become active. Using these buttons you can now record all
events in a game. Let's start by looking at what happens when a player takes a shot.
There are several ways to indicate that a shot has been made. The most obvious
is to touch the Shot button with a player button selected. However, when a shot is recorded in this way, no
information about the location of the shot is recorded. To record location information, with the player button
selected, touch the spot on the court where the shot was made. The location will be recorded when you lift your finger
so you can drag the player around as much as you want and lift your finger when the location is just right.
The third way, which is just a shortcut to selecting the player button and touching Shot, is to double
touch the player button. Using the double touch method will also not record any shot location information.
|
 |
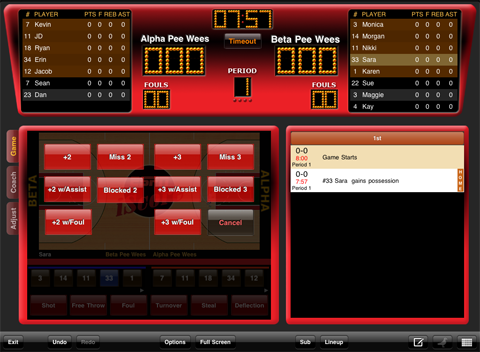
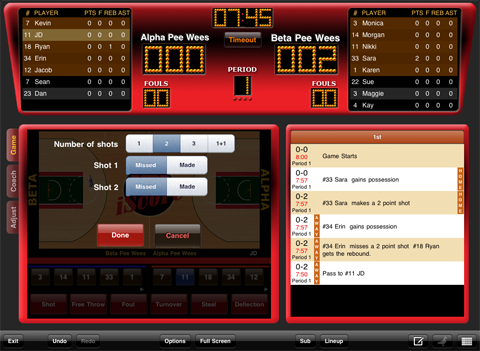
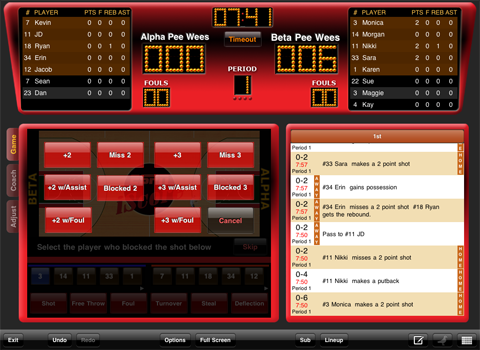
After indicating that a player made a shot using one of the three methods, you will be presented
with a selection of the possible outcomes of the shot. On the top row you will see options for the
player making or missing a two or three point shot. Use these buttons if there was no additional
action such as an assist or rebound on the shot. In the next row you will see options for made shots
with assists and missed shots with rebounds. For example, if the player made a three point shot with an assist
from another player, touch the +3 w/Assist button. If the player missed a two point shot and another player rebounded it,
touch the w/Rebound button under the Miss 2 button. The third row allows you to indicate a made shot where there was also
a foul on the shot (the foul button options will be available in version 1.1). If a shot was blocked by a defensive
player you can indicate that by pressing the Blocked By button. You can also choose Cancel if you indicated a shot
by mistake.
|
 |
When you select +2 w/Assist or +3 w/Assist you will be asked who on the offensive team made the assist. The players on the defensive team will be disabled.
|
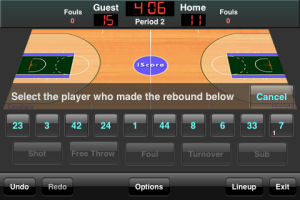 |
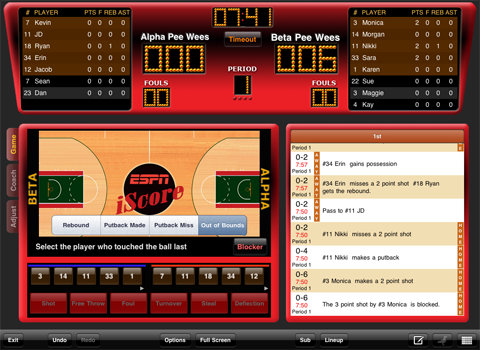
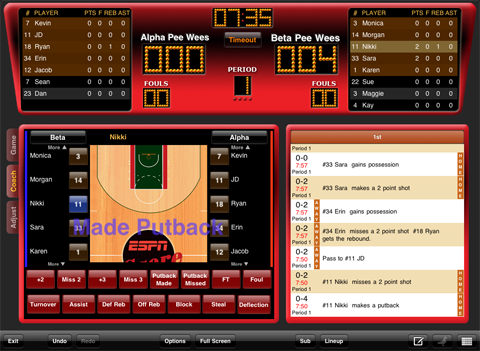
When you select w/Rebound under the Miss 2 or Miss 3 buttons you will be asked who made
the rebound. Since any player can make a rebound, all of the buttons will be active.
|
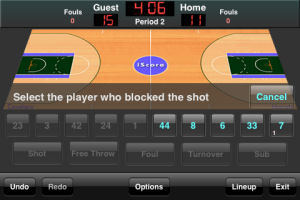 |
When you select the Blocked By button you will be asked who on the defensive team blocked the shot.
The player buttons for the offensive team will be disabled.
|
 |
When you select +2 w/Foul or +3 w/Foul buttons you will be asked who on the defensive team committed
the foul. The player buttons for the offensive team will be disabled.
|
 |
After selecting the player who made
the foul, the free throw options will be shown.
|
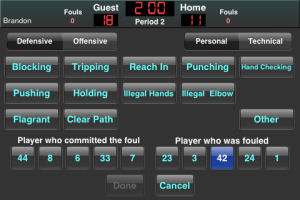 |
You can assign a foul by selecting the player who has possession of the ball when the foul was committed and
touching the Foul button. You will then be presented with the choices for the foul. You can select either offensive or
defensive fouls and personal or technical fouls at the top. Depending on your selection for defensive/offensive
and personal/technical you can then select the type of foul committed. You can also select the player who committed the foul
and the player who was fouled.
|
 |
When a defensive personal foul is committed, the player button will show the total defensive personal
fouls committed by that player in the lower left hand corner of the button. The foul will also be added
to the team fouls displayed at the top near the team scores. Team fouls are reset to 0 after each period.
Player technical fouls are displayed in the lower right hand corner of the player buttons.
|
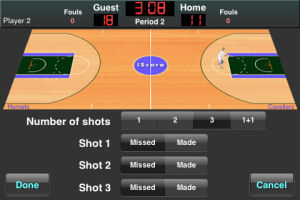 |
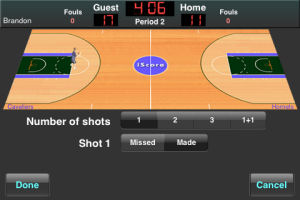
You can perform a free throw at any time by selecting the player who will make the free throw and touching the Free Throw button. You will be presented with
the choice of 1, 2 ,3 or 1+1 free throws. Assign Made or Missed for each.
|
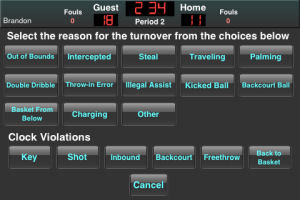 |
You can indicate a turnover by selecting the player who had possession of the ball when the turnover occurred
and selecting the type of turnover from the choices displayed. Turnovers resulting from clock violations are shown at the bottom.
|
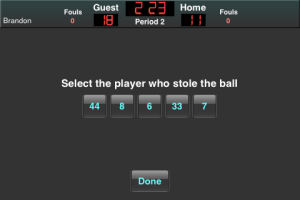 |
If the turnover was a steal or interception, you will be asked who stole or intercepted the ball.
|
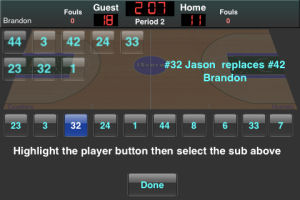 |
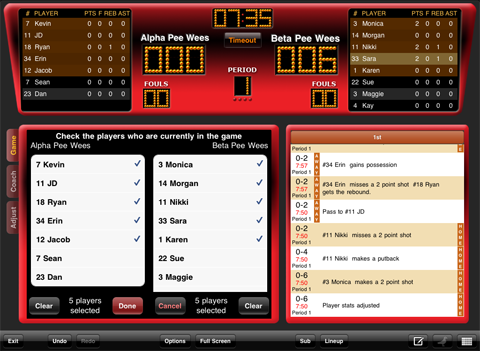
Substitutions can be performed by selecting the player who will be substituted and then selecting the
player who will replace him. Continue in this manner until all substitutions have been made, then touch Done.
|
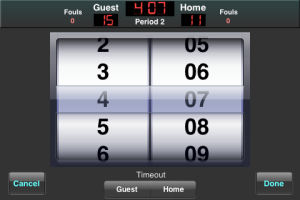 |
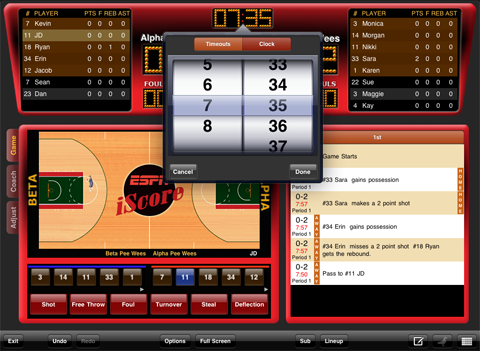
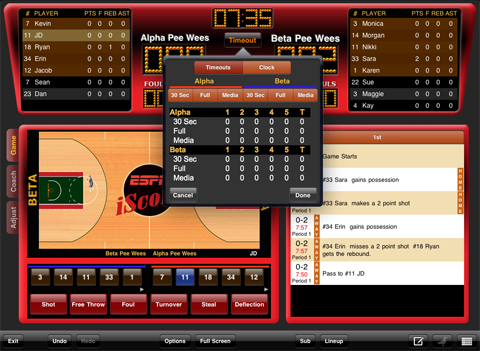
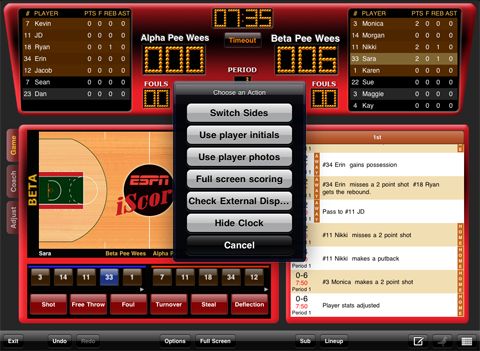
The clock can be paused at any time by touching it. Touching it again will restart the clock. Double touching
the clock will bring up an interface that will allow you to adjust the time. You can also indicate a
home or guest timeout.
|
 |
Remember that you can score as much or as little as you want. It can be as simple as double clicking the player
button and selecting +2 or +3 for each basket made. From there you can record additional info as you become
more comfortable with the interface.
|